What Is The Best Headliner Adhesive? (2020 Reviews)

There are few things worse than a sagging headliner, but the best headliner adhesive can fix that “old car look” really quickly. After many years of drastic temperature changes, excessive moisture, and powerful UV rays, your headliner is starting to sag.
Using a headliner adhesive is a great way to quickly and affordably fix that problem without involving body shops or professional help. There are quite a few different options on the market, and we’ve put in the research to compile a comprehensive list of the best headliner adhesives for 2020 and beyond.
Quick Picks: See Our Top 3 Choices for Headliner Adhesive
Page Contents
- Choosing the Best Headliner Adhesive
- Temperature Resistance
- Ease Of Use
- Drying Time
- Longevity
- Compatibility
- Types of Headliner Adhesives
- Liquid
- Aerosol
- Liquid vs. Aerosol Adhesives
- So, What’s Better?
- 10 Best Headliner Adhesives 2020
- 1. 3M Headliner and Fabric Adhesive
- 2. Loctite 37312 Spray Adhesive
- 3. Gorilla Heavy Duty Spray Adhesive
- 4. Permatex 27828 Body Shop Heavy Duty Headliner
- 5. 3M Super Yellow Trim Adhesive
- 6. Permatex 81850 Black Super Weatherstrip Adhesive
- 7. Scotch Super 77 Multipurpose Adhesive Spray
- 8. 3M Spray Trim Adhesive
- 9. Tear Mender Instant Fabric and Leather Adhesive
- 10. Polymat 20oz Hi-Temp Spray Glue Adhesive
- Benefits of Headliner Adhesive
- How to Install Headliner Adhesive
- Remove The Headliner
- Remove Lights
- Scrape Old Glue
- Apply New Glue
- Apply New Headliner
- FAQ
- What is a headliner?
- What is a headliner adhesive?
- Can you paint over a headliner adhesive?
- Does humidity impact the adhesive?
- Can you fix a headliner without removing it?
- Conclusion
Choosing the Best Headliner Adhesive
So, now you’re faced with a decision. Are you going to attempt to tackle this sagging headliner by yourself? Or, are you looking to shell out some serious cash to have a professional take care of it?
Suppose the first one sounds more like you, congratulations because you’re a doer and you’re not afraid to take on a difficult challenge. We appreciate people like that. The good news is, repairing a headliner is much simpler than you think. You must know what headliner adhesive to buy, though.
Here are some of the most important components of the best products on the market.
Temperature Resistance
Chances are if you have a sagging headliner, you live in a place where the temperature fluctuates. When it goes from hot to cold and vice versa, it creates moisture in your headliner’s materials, and that’s what eventually causes it to sag.
For that reason, one of the most important features you need to have is a temperature resistant headliner adhesive. The typical rubber-based options won’t work because excessive summer heat may cause it to melt. Be sure to look for something with the strongest hold even under the harshest of temperatures.
Ease Of Use
Depending on your level of experience and comfort with this job, you’ll want to use an easy to install product. You have a few different options for adhesives, but the common ones are aerosol and liquid. An aerosol is usually easier to install because you can cover more area faster and it’s easier to get a smooth finish.
Drying Time
We’ve all faced a situation where we’re waxing our car in the sun, and it dries before we had a chance to wipe it off. The same rules apply when you’re using headliner adhesive. While a quick-drying product is a desirable feature, you need to understand what that entails.
Make sure you’ll have enough time to apply everything, secure it, and have time to spare in case you need to make any last-minute adjustments.
Longevity
Headliner adhesive gets designed as a one-and-done solution to your problem. If you have to keep revisiting the sag every few months, what good is it? This reason alone is why we buy specialized products to repair our headliners because they’re made to hold up no matter what. Make sure the product you choose stands the test of time.
Compatibility
Not every adhesive is compatible with every fabric. Some require a certain glue, and if you use the wrong one, you’ll create a worse mess than you had before.
Types of Headliner Adhesives
If you think you can dig into your kid’s backpack and pull out some Elmer’s to get the job done, you’re mistaken. Using the wrong type of glue will only create more problems down the road. You want to make sure you understand the different types of adhesives, so you choose one that’s easy to apply and works over the long term.
Liquid
These require the use of a spray gun, but they do cover a large area if you have to repair the entire headliner. Liquids are also nice when you’re fixing a small crack or opening because you can apply them to an isolated area without spreading it too far.
Aerosol
Aerosol sprays are easy to use because they don’t require any additional hardware, and you can cover the most surface area in the least amount of time. All you need to do is spray it, and you’re ready to secure the headliner back where it belongs.
Liquid vs. Aerosol Adhesives
These are the two primary choices you’ll find below, and they each have their own set of pros and cons. Liquid glue is nice when patching up small cracks and damaged sections, but it also works well on larger jobs.
When you have a situation where the entire headliner is falling off, you can re-bond the whole thing by applying glue to the area and attaching the headliner that way. Glues are often easier to adjust, but they require more product to cover the area.
Aerosol, on the other hand, covers more area but doesn’t offer the same powerful bond that you’ll get from liquid glue. Many aerosols dry fast, which is an ideal feature for some but a nightmare for others. We’d prefer something that dries a little slower because it gives you more time to adjust the headliner if you need to.
If you have something that dries in five minutes, you better know exactly what you’re doing or work really fast.
So, What’s Better?
It’s impossible to pick one over the other because they each have their own time and place. If you’re dealing with a large scale job on a lightweight headliner, you can use aerosol because it will hold up on the lighter material. If it’s a large job on something heavy, you’ll need a powerful liquid adhesive.
Liquid adhesives are also the desired choice for small isolated jobs where you need to repair small cracks and damaged sections.
10 Best Headliner Adhesives 2020

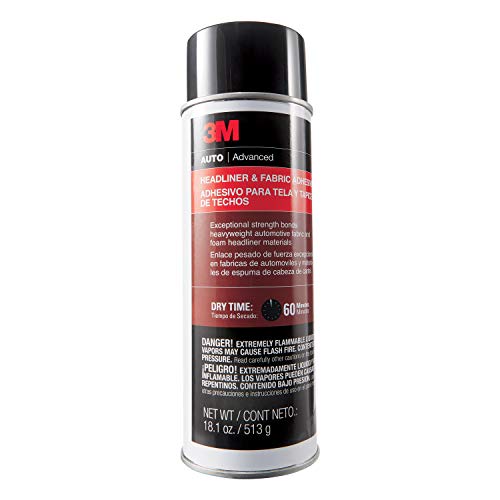
1. 3M Headliner and Fabric Adhesive
Exceptional strength and control even when bonding heavy headliners inside your car.
Pros
- Exceptional strength
- Bonds many fabrics
- Great for heavy headliners
- Dries in as little as 30 minutes
- Even spray
Cons
- Clogged nozzles
If you’re trying to fix a damaged or saggy headliner, this is the adhesive you want to you. 3M is well known for crafting the highest quality products, and this one specifically is versatile, and you can use it on a large assortment of fabrics, so it’s sure to work for you.
You can even use it to bond other things in your car as well, like carpets. The can sprays a nice even layer that looks like a professional did it, and it dries pretty quick in around 30 minutes.
There are some issues with clogged nozzles on some of the bottles, but there’s no guarantee that you’ll experience the same problem.

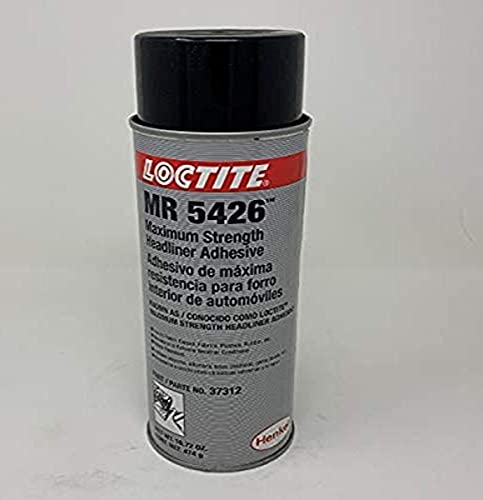
2. Loctite 37312 Spray Adhesive
This spray adhesive is incredibly easy to use, and you can apply it in less than 15 seconds.
Pros
- Apply in 15 seconds
- Dries in five minutes or less
- Highly versatile formula
- Well respected company
- Easy to apply
Cons
- May require a few cans to complete the job
Loctite is another company with a strong reputation, and that’s why we chose this one as our number two pick. The headliner adhesive is incredibly easy to use because you can apply the entire can in as little as five seconds. When you’re done, it only takes around five minutes to dry.
As we said, the adhesive’s fast-drying nature can be a pro or a con depending on how you look at it. If you have a steady hand and you’re confident in your ability to get it done right the first time, this might be the adhesive you want to try.
You can also use it for other purposes like fixing trunks, linings, and door panels too. It’s a handy multipurpose spray to keep around.

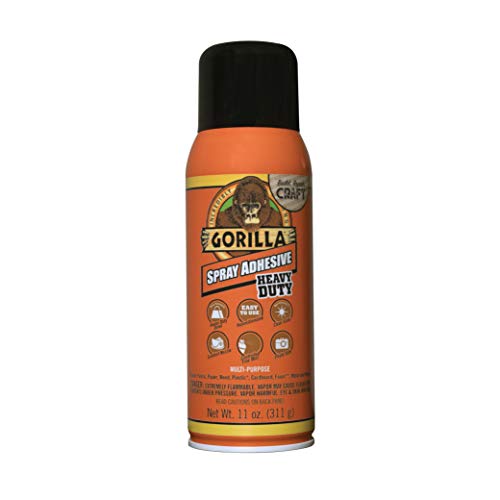
3. Gorilla Heavy Duty Spray Adhesive
Gorilla is an affordable brand with a strong reputation. It’s fast-drying and permanently bonding.
Pros
- Great for repositioning
- Light mist formula
- Non-yellowing
- You can use on other surfaces
- Dries in 10 minutes
Cons
- Strong smell
- Not strong enough to heavy headliners
Everyone knows about Gorilla glue, but their heavy-duty adhesive is also quite popular. It’s simple to use, and it comes with a wide pad nozzle that creates a mist, which makes it much easier to control than some of the foam sprays. It dries and creates a permanent bond on metal, fabric, wood, foam, glass, and more.
This formula is also non-yellowing, so you don’t have to worry about it playing with your interior’s appearance. It dries in around ten minutes, which we think is perfect. It gives you just enough time to position your fabric before it gets tacky.

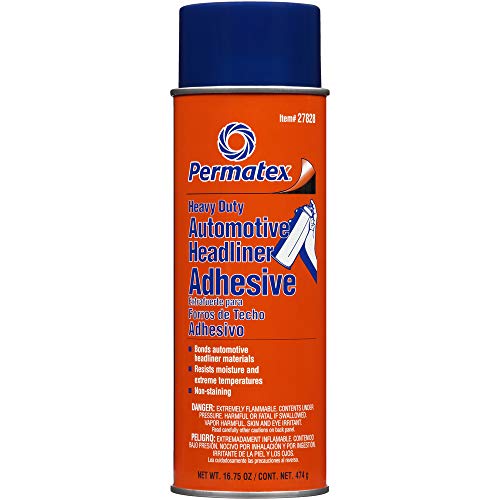
4. Permatex 27828 Body Shop Heavy Duty Headliner
Premium and versatile formula you can use on a wide assortment of different applications.
Pros
- High-temperature resistance
- Water-resistant
- Versatile
- Easy to apply
- Smooth coating
Cons
- Clogged nozzles
This high-quality and premium headliner adhesive is high strength, and it has high-temperature resistance as well. That’s the reason that many professionals often turn to this brand. It’s a great choice for repairing sagging headliners in trucks, cars, and SUVs.
The aerosol spray is easy to apply, and it’s versatile enough to work on a variety of different fabrics and surfaces. The high temperature resistance is what draws people, though. You can use this in even the most extreme weather conditions, whether it’s hot, cold, damp or wet, it will maintain its bond.

5. 3M Super Yellow Trim Adhesive
This extra-strength and heat resistant formula from 3M provides ultimate strength but at a cost.
Pros
- Heat resistant
- Moisture resistant
- Works quickly
- Easy to apply
- Versatile
Cons
- Issues with longevity
We’re riding with 3M because we respect the brand and think they produce high-quality materials. This fast-acting and potent formula is a great choice for all your auto body repair needs. It creates a strong bond with everything it comes in contact with, and you can use it on a wide assortment of fabrics.
It dries in minutes, but the main selling point is the heat and moisture resistance. Heat and moisture cause the bond to wear away, but this adhesive tries to prevent that. You might need a few coats to ensure it lasts, though, because many people have had issues with the adhesive wearing off after a few months.

6. Permatex 81850 Black Super Weatherstrip Adhesive
Permatex designed this professional-grade adhesive specifically to withstand the most extreme weather conditions.
Pros
- Dries fast
- Versatile
- Great in extreme temperatures
- Resistant to everything
- Affordable
Cons
- Removes paint if you get any on it
If temperature resistance is your number one concern, then you’ll want to get this headliner adhesive. It works on everything, including trunks and door panels, windows, and more. It’s easy to apply and dries quickly as well.
It’s important to understand that this is a liquid glue and not an aerosol adhesive. You’ll have to use a lot more of this to cover the same amount of surface area as you would with most aerosols.

7. Scotch Super 77 Multipurpose Adhesive Spray
This versatile headliner adhesive is a great option if you only need to fix a small area.
Pros
- Can use on a variety of materials
- Strong bond
- Fast drying
- Affordable
- Easy to apply
Cons
- Not for large spaces
The reason this made the list for headliner adhesives is that you can use it for smaller areas. Instead of buying an aerosol can and having to use the whole thing in one shot, you can use what you need from this and save it for another job later.
A primary downside is that it won’t hold on heavy materials, so some people might have a hard time getting it to work with their headliner. That said, many customers of the product experienced success, filling crack and fixing damaged headliners.

8. 3M Spray Trim Adhesive
This 3M spray is designed explicitly for lightweight upholstery and cloth, so it’s the perfect choice for headliners.
Pros
- Invisible when dry
- Perfect for lightweight material
- Easy to reposition
- Simple to apply
- Great 3M reputation
Cons
- Not for heavy materials
Here we have a clear adhesive that works perfectly for headliners. It’s designed to attach itself to lightweight trim and other features, which makes it a great choice for headliners. It doesn’t dry too fast, so it’s easy to reposition too. If you’re concerned about your ability to do this job, you want something that won’t dry so fast that you can’t adjust it.
Since it’s easy to adjust and there is no yellowing, that makes this one of the best headliner adhesives for people who don’t have a lot of bodywork experience.

9. Tear Mender Instant Fabric and Leather Adhesive
This product has over 101 uses, whether it’s indoor or outdoor, so you know it’s moisture resistant.

Pros
- Dries clear
- Waterproof bond
- Non-topic
- Flexible and adjustable
- Plenty of uses
Cons
- Not aerosol
This non-toxic adhesive produces a strong and waterproof bond. The company says that it has more than 101 uses repairing primarily fabrics, leather, and vinyl. It’s also highly water-resistant, so you won’t have to worry about the moisture in your headliner getting at the fabric.
Since it’s a glue, you know that you won’t be able to cover as much space with it and if you have a big job, you’d be better off with an aerosol can. That said, you could always use this in a spray, but it’s primarily intended for fixing small spots and cracks.

10. Polymat 20oz Hi-Temp Spray Glue Adhesive
Polymat is a fast-drying high-temperature resistant adhesive that is ideal for arid climates.

Pros
- High-temperature resistance
- Industrial grade
- Water resistance
- Designed for heavyweight liners
- Easy to bond
Cons
- Strong odor
- Dangerous chemicals
Our last option is a fast-drying high-temperature glue that is designed specifically for heavyweight liners and vinyl tops. Heat resistance is necessary for some, and this adhesive brings it to the table in a 13-ounce can. It takes between five minutes to one hour to dry, and it contains a strong blend of solvents, including acetone and hexane.
This adhesive is popular in the marine industry because of its water resistance and ability to adhere to a wide variety of surfaces. It is considered dangerous and harmful to humans, so be extremely careful when using it.
Benefits of Headliner Adhesive
The headliner in your car serves a very important purpose by protecting you and insulating the car’s inside. When the glue starts to break apart and wear down from the elements, it eventually leads to sag and even damage to the headliner.
When moisture and dampness get in between the material and the exterior of the car, the glue will soften until eventually, the entire headliner starts to dip down and hit you in the head. While this might not seem like a serious issue, it’s much more than a cosmetic problem. If you let it go for too long, you’ll run into much more expensive repairs down the road.
It’s crucial that you fix this problem as soon as you notice it, and this is where headliner adhesives come in. They step in place to re-adhere the headliner to the car’s body the same way it originally was.
As mentioned previously, you can’t use any old glue to accomplish this, though. It needs to have weather resistance components and strong bonding capabilities; otherwise, you’ll fix the problem again in a few months.
How to Install Headliner Adhesive
To determine how you’ll use the headliner adhesive, we have to first look at the problem. There’s a few different ways to look at this:
- You have small cracks and a little sag
- You have a lot of sag and cracks
- Your headliner is coming off completely
If you’re dealing with a few small cracks and some sag, you can repair that issue using a small amount of glue. The glue will help reattach the headliner to the material underneath, and since you don’t have a lot of area to fix, you should be able to get away with using a small portion of the glue.
When you’re dealing with a large amount of sag and cracks, here is where you’ll want to bring out the spray. With an aerosol spray, you can cover more area in less time and create an even coating to bond with the headliner.
If your headliner is draping over your back seat and you can pull the entire thing off, you’ll want to apply a nice coating of glue for this. The glues often offer a better deal, but it requires that you use quite a bit of it. You might have to buy three or four bottles of the glues we recommended above, depending on the size of your vehicle.
Here are a few of the actionable steps you’ll have to take:
Remove The Headliner
The first thing you need to do is completely remove the headliner. If you want to do the job the right way and make it look professional, this is a necessary step. Remove the pieces that are held in place, and you’ll likely need a screwdriver to do this. Unscrew everything, and you’re ready to move on.
Remove Lights
There are likely a few lights on the roof of your car, and you’ll need to remove them before applying glue or spray. If you choose not to remove the lights, you’re increasing your chances of damaging or tearing more of the headliner than necessary.
Scrape Old Glue
Now that you’ve got everything removed, you need to prepare the surface for the new glue and headliner. Remove as much of it as you can by scraping and peeling it off. You never know what was originally used to bond the two, so be extra cautious and use gloves when peeling off the glue.
Apply New Glue
Next, we need to apply the new glue. Make sure everything is dry and free from any debris. You’ll get a stronger bond if you do this and increase the chances that everything will hold up better over time. Apply the adhesive evenly to create an even coating.
Apply New Headliner
Hopefully, you went with a repositionable adhesive; otherwise, you likely don’t even have enough time to read this. Now you need to stretch the fabric onto the headliner and make sure there are no wrinkles or creases. Adjust as needed if you can and give it some time to dry before attaching everything you removed.
FAQ
Here are some of the most frequently asked questions revolving around headliner adhesives and how to install them.
What is a headliner?
The headliner is everything used to insulate and protect you from the elements above your head. It’s a material that adheres to the inside roof of the car, and it’s usually made up of five or six different layers of material. Depending on the car you have and the headliner used, this can look very different from one car to another.
Headliners also play a major role in reducing road noise. They have insulated layers that help keep out all the sounds of the road.
What is a headliner adhesive?
A headliner adhesive is basically a strong glue for the headliner fabric inside the car. The goal of this glue is to bond the headliner to the material used on it. If your headliner is sagging or damaged, that means that the previous glue has broken up or worn down to the point where it can no longer hold the material up.
At this point is when you determine if you need to use a liquid or aerosol adhesive to create that bond again. A sagging headliner does not only look unsightly, but it’s dangerous if it’s sagging down and obstructing your vision.
Can you paint over a headliner adhesive?
You don’t need to paint over a headliner adhesive. The adhesive goes between the headliner and the fabric, so you won’t see it in most cases. Many headliner adhesives are non-yellowing as well, so they’re almost invisible when they dry.
Does humidity impact the adhesive?
Yes, all elemental factors will impact the bond of your headliner adhesive. If you live in a place with high humidity, we recommend going with a product that is heat resistant and moisture resistant. Humidity is primarily moisture in the air, and when the temperature changes quickly, some of that moisture can build up underneath the headliner.
When the moisture gets between the headliner and the fabric, that’s when the glue starts to break apart, and at that point, you have a saggy headliner.
Can you fix a headliner without removing it?
Yes, you don’t always need to take the headliner off to repair it; in many cases, you can simply use glue or aerosol spray to fix the portion that’s peeling off or hanging down. What we’ve seen in most cases is that the headliner starts to peel around the top of the doors, so the easiest solution is to apply glue where needed and bond it again so you don’t need to peel the whole thing off.
Conclusion
Choosing the best headliner adhesive is much easier when you know what you need. Take a look in your vehicle right now and determine what type of job you’re dealing with. That will immediately tell you which of the previous ten headliner adhesives is the right one for the job.
Keep in mind the severity of your situation and pair that with the weight of your headliner and material.
We think this guide has offered every small detail you could need to know about headliners and the glues that go along with them. By now, you should be able to make a confident purchasing decision that will satisfy your needs and ensure you don’t have to deal with sagging a headliner any time soon.